You are all becoming PhotoShop masters and now it is time to take your skills further. Today find a couple tutorials to follow at this link
Make a portrait into a zombie, make an image into a puzzle, have a little fun!!!!
Monday, April 27, 2009
Vivid Color...
Our next task is simple... Shoot images of vivid, bright, contrasting, brilliant colors. You should still use all of your compositional techniques (angles, rule of 1/3, filling the frame, leading lines, framing etc.) but also make sure your subject "pops" off the page. We will be shooting on Wednesday, remember your camera and come with a plan of what/where to shoot.


Friday, April 24, 2009
WHAT TO TURN IN...
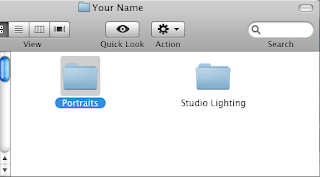
In one folder labeled your name, create two sub-folders labeled and including the following:
Studio Lighting:
Portrait Photo Shoot (out of class, of one or two subjects...)
To create a .jpeg from Photoshop:
File > Save As > File Type = jpeg
(you can not just change the extension, it will corrupt the file.)
Studio Lighting:
- ***one .jpeg image of your best edited studio lighting shot (don't be afraid to crop)
- ***a contact sheet of your 12 best studio lighting images saved as a .jpeg
Portrait Photo Shoot (out of class, of one or two subjects...)
- ***6 images, all edited according to the Portrait Guidelines below.
- ***1 additional (or label one of the above) image to print as your best portrait.
- save all the above as .jpeg files

To create a .jpeg from Photoshop:
File > Save As > File Type = jpeg
(you can not just change the extension, it will corrupt the file.)
Wednesday, April 22, 2009
Portrait Guidelines...
Between now and the end of the week you will adjust your portraits.
Here is a list of the different types of portraits photos you will turn in:
Finally, you will turn in your best picture as well.
Here is a list of the different types of portraits photos you will turn in:
- A Vignette Photo
- A Grayscale Method Photo
- A One Item Kept in Color Photo
- A selective Focus Photo
- A minimally adjusted photo
- One WHACKY anything goes portrait (change the colors, use the liquefy tool, and make this as unique and interesting as you can)
Finally, you will turn in your best picture as well.
Thursday, April 16, 2009
Studio Lighting...


 Studio Lighting!!! Your task today (Wed/Fri) is to shoot some interesting , creative and unique portraits using the studio lights. Remember the different lighting techniques demonstrated in class. Use the lights to add emotion, feeling, or interesting shadows to your images. Try to think out of the box, manipulate the image with Manual settings on the camera, blur motion, stop action, take tons of pics, and have FUN! Shoot for 1/2 the period in groups of 3 to 6 per light station. Everyone should shoot their own photo session. Take turns as each others subjects. Shoot a minimum of 12 pictures per photographer. We will then edit them and make one fantastic using your photoshop skills.
PORTRAITS!!!!!!


1. Find an interesting human subject. The person you choose should WANT to be in the picture and they should be willing to cooperate.
2. Talk to your subject. You are the director of this adventure, make it what you want. Use colors or lighting to create a concept for your portrait. Costumes or uniforms work great. Imaginary ideas are OK. Choose an interesting setting based on your concept.
3. Change angles between shots. Shoot at least 25 pictures of your ONE subject.
5. Change your lighting; Use filters, flashlights, lamps, or multiple lights to enhance your picture.
6. Remember you are the boss, make them change their expression. Pretend it is high fashion and they have to create the next great "look" like blue steel (Zoolander).
7. Most importantly for this assignment don't forget your composition rules. Use framing, leading lines, rule of thirds, color contrast etc. to enhance your photo. Fill the frame!!!!
HAVE FUN & BE CREATIVE!!!! try to think out of the norm to come up with a creative setting, pose, expression, outfit, etc to make an amazing portrait!!!!
Monday, April 13, 2009
Friday, April 10, 2009
BACK TO BASICS...
Today we are going back to the beginning, we are working on composition. You task is to review each of the compositional techniques below and then go out and shoot 3 GOOD images for each technique. These are basic practices that should be ingrained into your brain and you should consider each of these with ever shot you take (for class and otherwise!).
Wednesday, April 8, 2009
Self Portrait Extra Credit...
Create a comic of yourself. Be creative and turn one of your self portrait images into a cartoon or comic, add text or thought bubbles, make it funny, have a social commentary, tell a story etc.

tutorials for help:
turning your pic into a comic style:
adding text bubbles:
tutorials for help:
turning your pic into a comic style:
- http://psd.tutsplus.com/web/20-insane-comic-book-style-photoshop-effects/
- http://www.tutorialized.com/view/tutorial/Photo-to-Cartoon-Line-Art-Conversion/41947
- http://www.photoshoproadmap.com/Photoshop-blog/2007/09/13/give-your-photos-a-retro-comic-book-effect/
adding text bubbles:
- http://www.tutorialized.com/view/tutorial/Cartoon-Speech-Balloon/33061
Subscribe to:
Posts (Atom)