- The folder should be named period_your name_12lanscapes
- Create a contact sheet of your 12 edited landscapes
- Include a full size version of your favorite landscape (save as .jpeg file)
- If you have yet to turn in your Contact Sheet of 60 pics include that as well
- Each of your 12 landscapes should look vivid and interesting, yet natural.
Wednesday, February 29, 2012
To Turn in FRIDAY
In one folder please turn in the following to my classes folder on the Staff server:


Monday, February 27, 2012

Wednesday, February 15, 2012
Mid-Winter Break Homework
Due on Monday the 27th of Feb:
- 60+ good landscapes
- from 3+ different locations
- all including F/M/B ground
- horizon lines NOT in the center
- avoid powerlines
- avoid treetops (whole trees are ok).
- try and show great vantage points, depth, and epic scenes.
In class shooting assignment
You will have the day Friday to take Landscapes. You should use this period to find interesting, creative and unique landscapes which all contain for/mid/background and a horizon line.
These images may count towards your required 60 GOOD landscapes due at the start of class Monday Feb. 27th.
Examples of good landscapes may be seen here:
http://www.outdoor-photos.com/
These images may count towards your required 60 GOOD landscapes due at the start of class Monday Feb. 27th.
Examples of good landscapes may be seen here:
http://www.outdoor-photos.com/
Shooting for today
We are looking for Landscapes. You need to find 5 landscapes. Each must include:
 When you return from shooting you will need to be able to identify each
of the above elements. We will be labeling them in Photoshop.
When you return from shooting you will need to be able to identify each
of the above elements. We will be labeling them in Photoshop.
- a horizon line
- a foreground (most important, the anchor!), midground, and background
- follow the rule of thirds, nothing should be centered.
- be interesting!

Landscapes v20
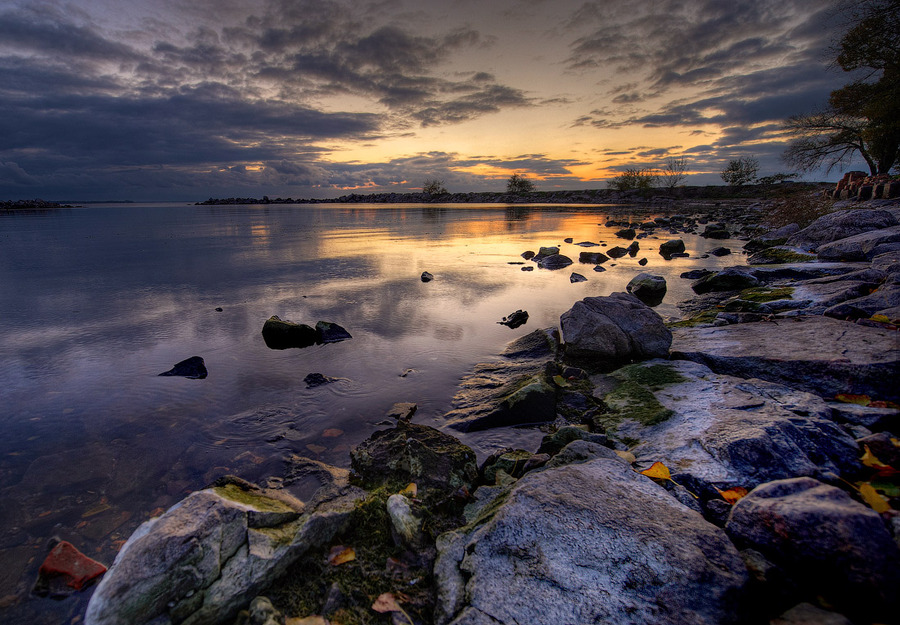
Landscape comprises the visible features of an area of land, including physical elements such as landforms, living elements of flora and fauna, abstract elements like lighting and weather conditions, and human elements like human activity and the built environment.
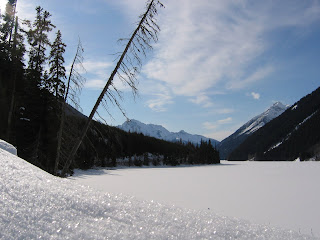
Please do not center the horizon line and try to show something in the foreground, mid-ground, and background.
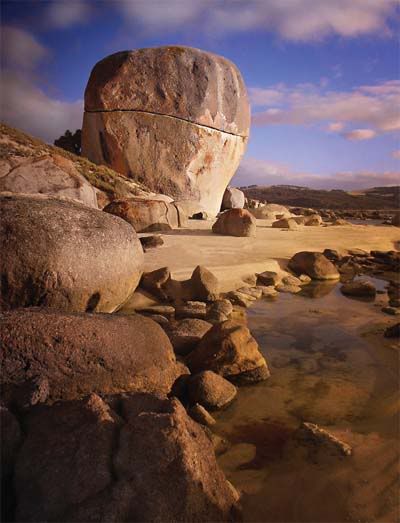
The trick to landscapes is to show depth:
the secret to getting your images to show depth is to include for/middle/background all in the same image. Let it lead the viewer from something up close to things far away... similar to the leading lines we just shot.
epic examples:
http://www.outdoor-photos.com/

Please do not center the horizon line and try to show something in the foreground, mid-ground, and background.
The trick to landscapes is to show depth:
the secret to getting your images to show depth is to include for/middle/background all in the same image. Let it lead the viewer from something up close to things far away... similar to the leading lines we just shot.
epic examples:
http://www.outdoor-photos.com/
Landscape Tips

Here are some surefire tips to help our landscapes... please read these, pick a tip you think is most advantageous.
Thursday, February 9, 2012
Photoshop
Today you are going to get an intro to photoshop. You have 12 amazing pics from Wednesday. Now it is time to start learning to edit them.
Steps for today:
Steps for today:
- Open Photoshop
- Open one of your images from Wednesday
- Save as - image-name_EDIT.psd
- Crop image if needed (never crop more than 20% of your image away)
- Apply Image Adjustments (beyond just AUTO)
- At least 3 adjustments per image
- do not move any slider more than 20% to keep it realistic
- Save image
- You will be applying adjustments to ALL your 12 images from Wednesday.
Wednesday, February 8, 2012
Importing Pics
- Open IMAGE CAPTURE FROM YOUR APPLICATIONS FOLDER
- Plug in your camera and turn it on
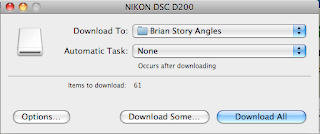

- Select DOWNLOAD SOME.
- Choose a new folder to download into EVERY time you download.
- Next select the pictures you want to download and save them to your NEW folder.
- and oyu are DONE!

Contact Sheets
In CS5 we need to use another program to make a contact sheet. We now use Adobe Bridge, its in your applications folder.

We then need to open the output window:

With the output window open you can select rows and columns and then find your pics. Then choose save PDF and it will save a contact sheet to your desktop (or wherever you choose). This is what you will turn in today!

We then need to open the output window:

With the output window open you can select rows and columns and then find your pics. Then choose save PDF and it will save a contact sheet to your desktop (or wherever you choose). This is what you will turn in today!
Taking Pics


Today you will shoot pictures!!! We are seeking unique angles, creative compositions, & fantastic images. You will have a partner to share your camera with and each of you will take 3 unique images of the following:
- curb/cement/pavement
- tree/bush/plant
- trash/litter/junk
- person/people/animal
Keep the
camera on auto today.
Intro to Composition:
composition is a putting together of a whole, the make-up of anything and/or a mixture of substance.There are no rules to composition, only guides and extremely flexible principles that may help us to see more sensitively instead of in a hit or miss manner. The more aware we are of effective composition, the more satisfaction we may derive from photography. Learning to give form and balance by putting together the elements harmoniously can help us see a subject in the strongest way.Position your subject |
 Photographing the woman slightly off-center creates a more interesting photo. | The perfect way to make photos more interesting is to use the rule of thirds:
|
Get closer to your subject |
 Getting closer allows you to capture the details and expressions of your subject. | The simplest technique for getting better photos: Get closer to your subject.
|
Crop your photo |
 Cropping the legs from this photo instantly transforms it from a snapshot to a frameable portrait. |
You won’t always get that perfect shot to begin with. Keeping the
rule of thirds in mind, try cropping your photo after you’ve shot it,
either in your camera or with photo-editing software.
|
Choose better photo backgrounds |
 An intricate background works well for subjects with simple or no patterns. |
Be sure the background of your photo doesn’t interfere with your
subject and take attention away from the focal points.
|
Pick the proper orientation |
 While both images showcase the reflection, the horizontal one also captures the river’s beautiful surroundings. |
Your camera produces a rectangular image. This gives you two
distinct orientations to work with—vertical or horizontal.
|
Use point of view |
 Instead of a traditional, head-on portrait, try an over-the-shoulder shot. | Break from the habit of shooting everything from eye level.
|
Frame your subject |
 An archway serves as a great natural frame for the subject—the building. |
Framing is what draws the viewer’s eye to the main subject.
Creative ways to frame your subject are everywhere!
|
Experiment with abstract photography |
 A close-up of beach pebbles is pleasantly punctuated by a seed pod’s shot of color. |
A fun way to learn more about basic photo composition is to zoom
in on abstract details. The purpose is to make a work of art rather
than show the object in a realistic way.
|
Subscribe to:
Posts (Atom)