Wednesday, December 15, 2010
4 ideas
- What four categories do you think you will pick?
- Sketch 4 thumbnail images, one for each category, showing your ideas
- Consider costumes or props and locations that you can use for the self-portraits... depict these in your thumbnail sketches.

Hints for self-portraits:
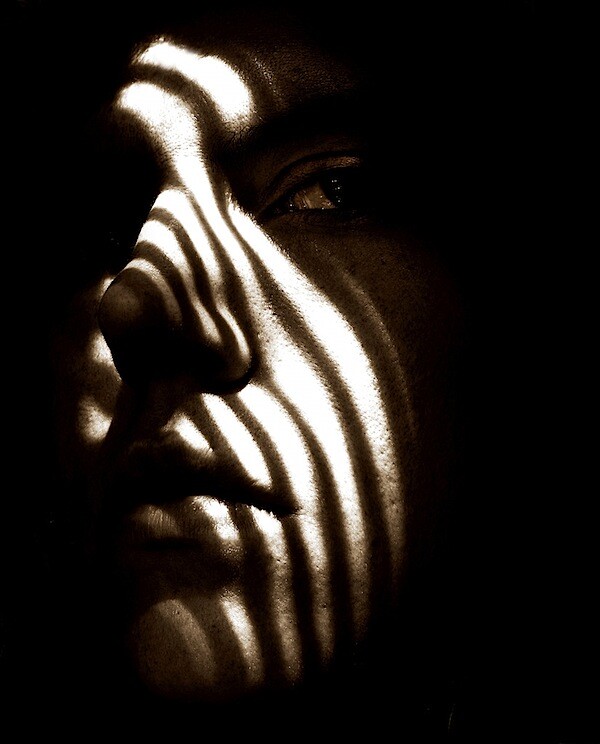
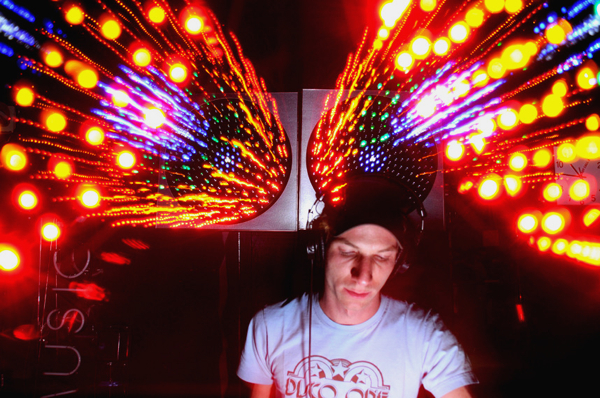
Use colors or lighting to create a concept.
Costumes or uniforms work great.
Change angles.
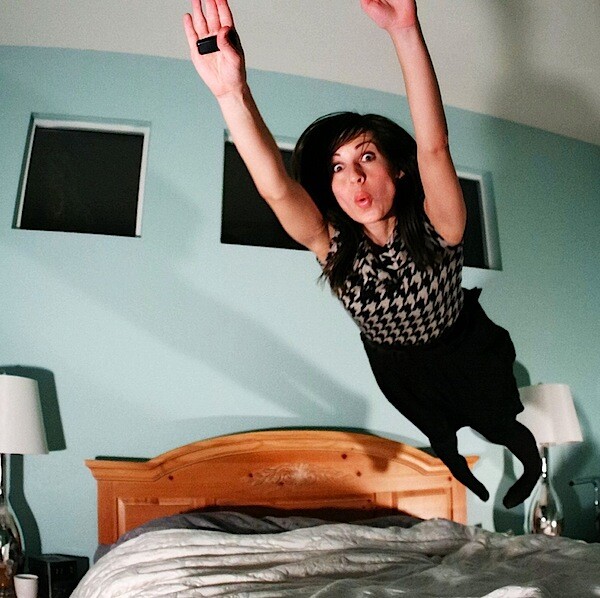
Use props.
Vary the lighting.
Try different emotional looks.
Pose in action.
Most importantly for this assignment don't forget your composition rules. Use framing, leading lines, rule of thirds, color contrast etc. to enhance your photo. Fill the frame.


WINTER BREAK. Self Portraints


self portraits!!!


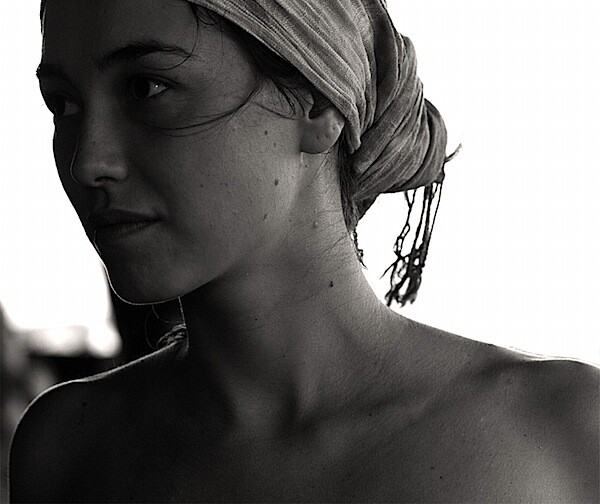
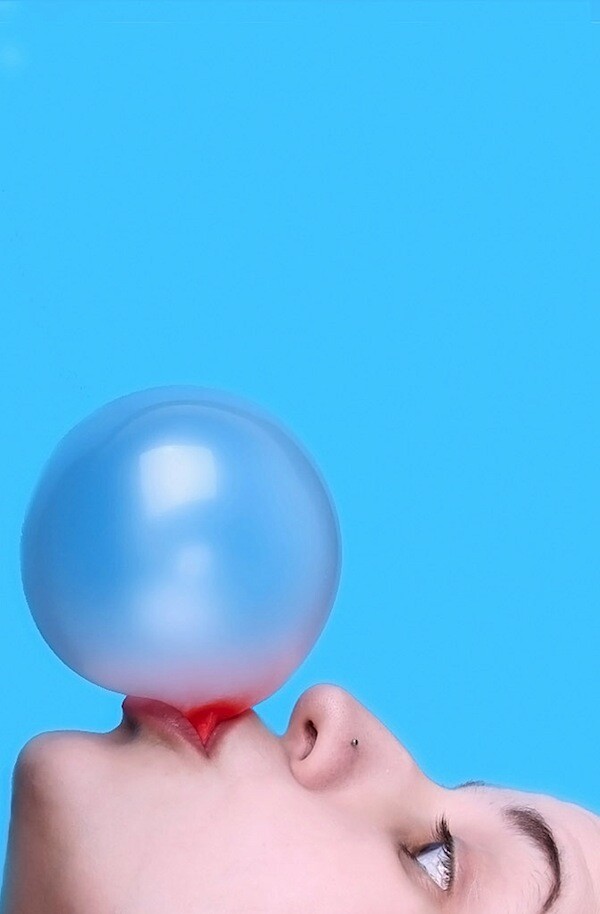
The Art of Constructing a Self-Portrait
A self-portrait comes from within. Injecting 'those we love' into the portrait steers one away from the harder task to trying to reveal self without adornment.
If you eat, sleep, and live for speed then your self-portrait should reflect motion and movement as one of its cornerstones.
If you are a reflective type, then reflections and patterns and their intersections should occupy a primary space.
If overall you feel more flawed then whole, then you wouldn't want to go about photographing the most pristine parts of yourself; you would want, instead, to capture your essence in a manner that describes and defines you without complaining. I say that because the essence of self-discovery requires you to be a benign observer of self so as not to hone in too closely on this or that part.
A sense of 'wholeness' is difficult to capture at best. Indeed, wholeness is almost impossible for some people to even understand -- let alone capture in themselves -- because their persons and their lives are so fragmented, so disorganized in general.
But that is what self-portraiture is all about, capturing the whole -- the whole of who you are as a person.
Try to be unforgiving in a benign and neutral way. Study yourself in the mirror and photograph what you see there. Then go inside yourself and photograph what you see there.

You will shoot four different good self-portraits over break (it will take LOTS of images to achieve 4 good photos). You need to pick four photo types from the following six categories, each final photo needs to come from a different category:
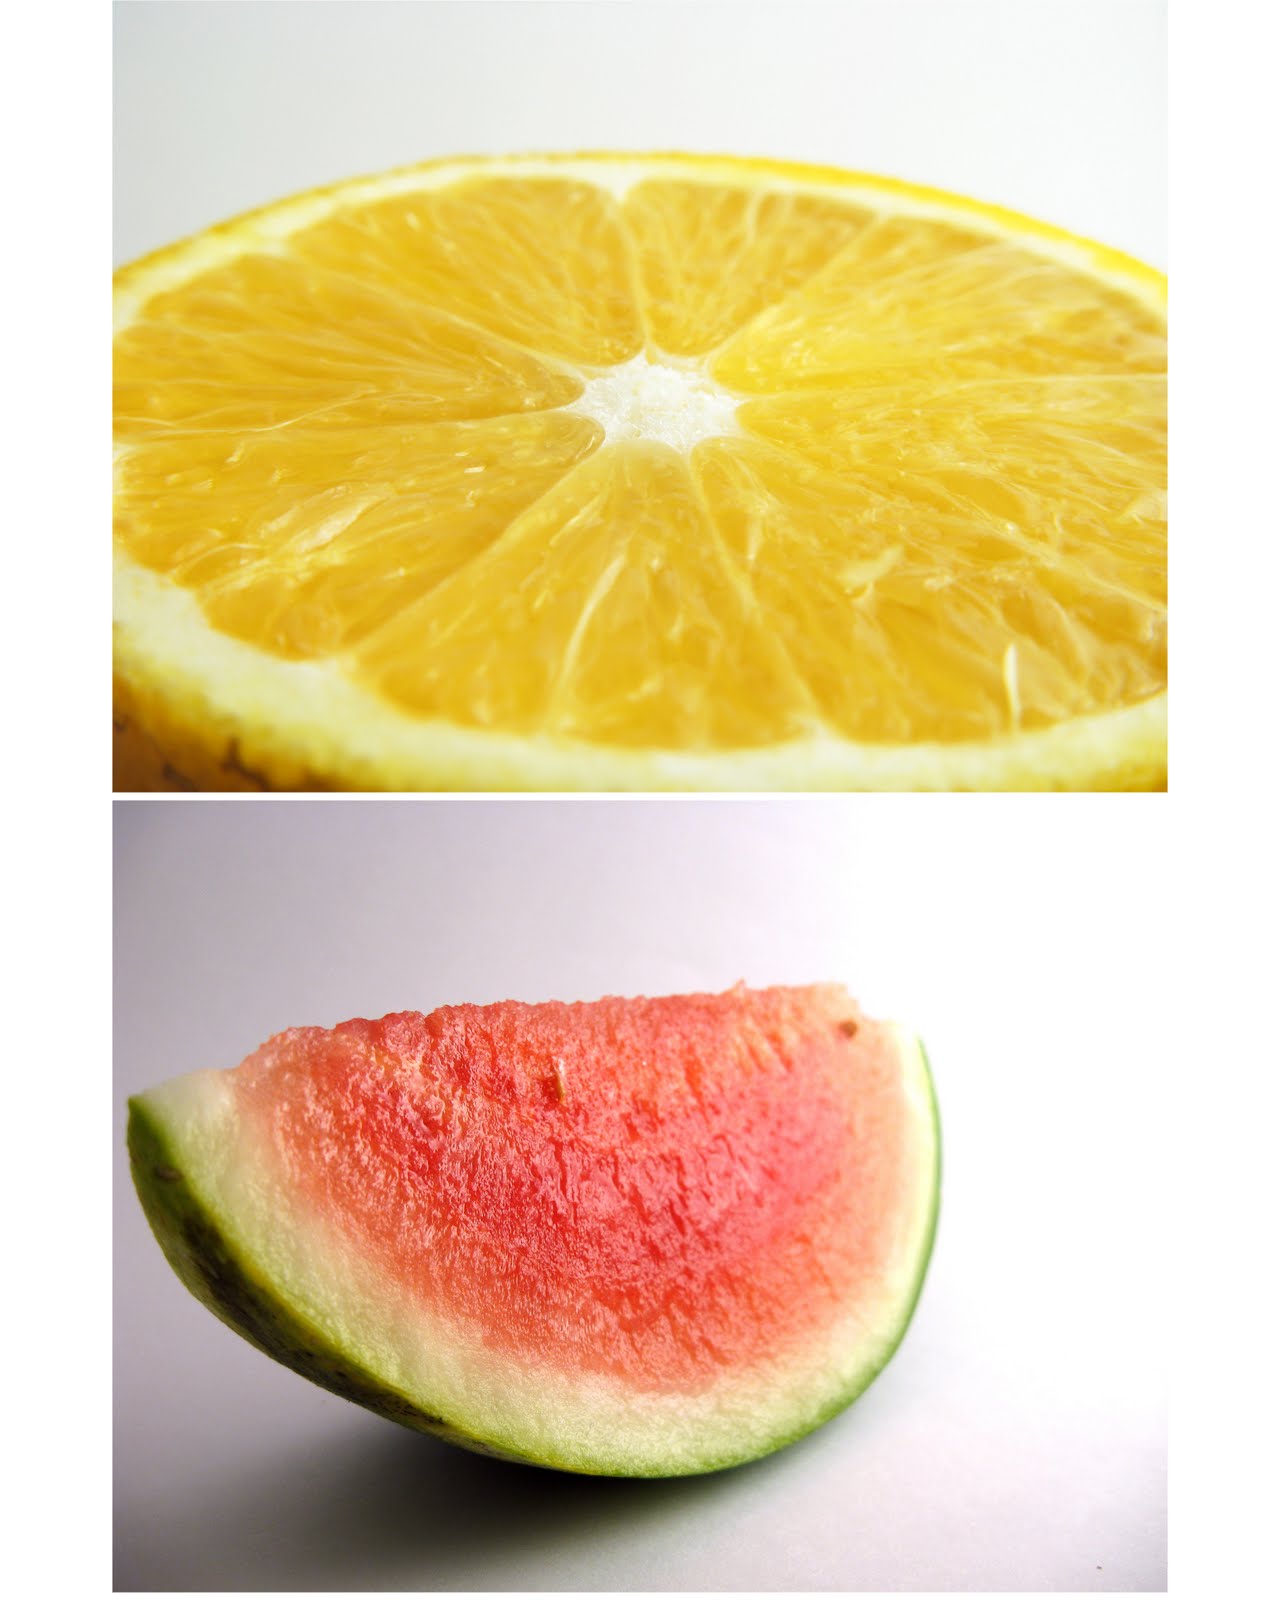
1. A self-portrait where color is emphasized. Color may include wardrobe, location, props, or natural objects. Think of your picture as a one or two color concept picture.
2. A picture that emphasizes lighting and shadows. This will be a grayscale self-portrait.
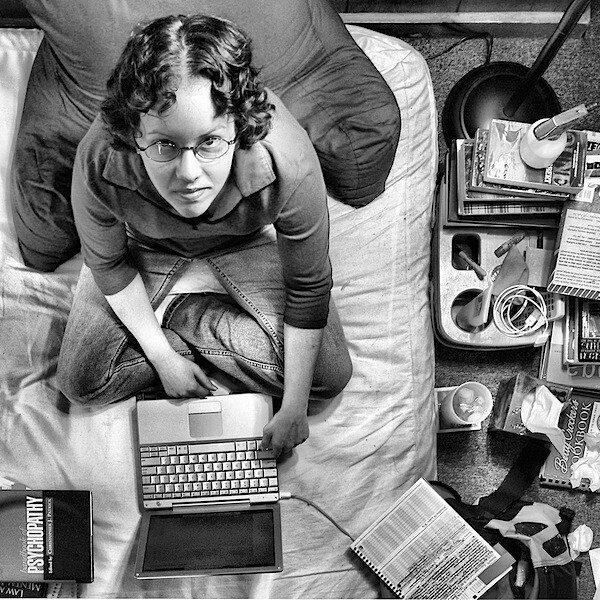
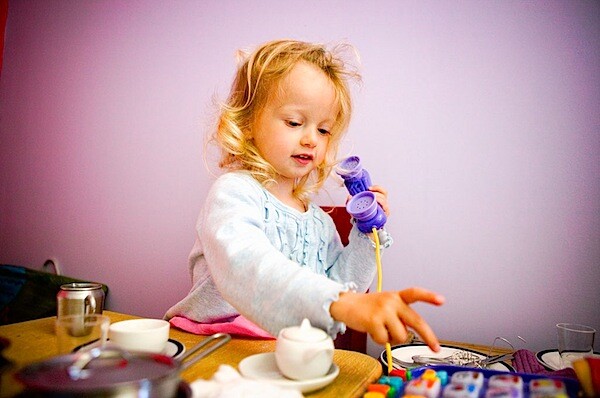
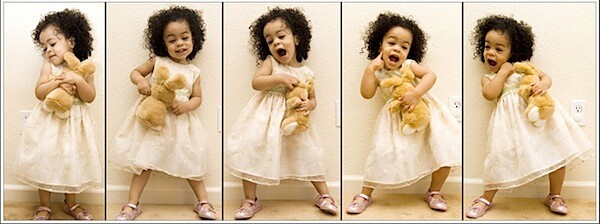
3. A self-portrait that showcases your interests and hobbies. In this picture we learn what you like to do away from school. Think about what interests you and transfer that into a photo.
4. A fantasy self-portrait. Dress up and use costumes. In this self-portrait you can use Photoshop to enhance your picture in any way, shape, or form. Transfer yourself to Hawaii or become a Viking like you have always wanted.
5. The Supermodel self-portrait. Dress up like a GQ or Cosmopolitan magazine model. This can be a grayscale or color picture. You will use Photoshop to airbrush and enhance this photo.
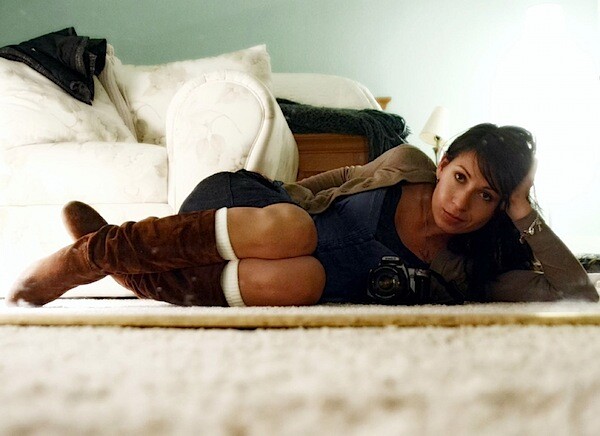
6. An abstract self portrait that focuses on textures, shapes, and interesting lines and patterns. You must be the subject of this image, but represent yourself in a creative, abstract and unique way where you are only partially recognizable...


Tuesday, December 14, 2010
still life to turn in
- contact sheet of 30+ pics
- 6 best edited images
- 1+ image with a text effect/title
EDITING: The Social Experiment


Last week we spent time shooting images documenting the social experiment. Our goal was to gather images that depicted the emotions and experiences of those participating. Today we will begin to edit these images.
requirements:
- Contact sheet with 24 different images
- 3 edited images
- 1 image using text/text effect to title the image
Monday, December 13, 2010
TEXT EFFECTS


Today you will be adding a title/text to one of your light box photos. Pick a photo you like and create a title or slogan for it. You will be using a "text effect" for this, pick one that is appropriate for your object. If a cell phone, maybe use a techie or robotish font. If an apple, maybe use an earthy text.
Here is a link to 140 tutorials. All of which will use the blending options:
Thursday, December 9, 2010
Thursday

Today is a shooting day for the "Social Experiment". Your goal is to gather together 24 different unique, interesting, thought provoking images about thoughts, ideas, feelings and emotions associated with this event. Look at it from all angles, take a creative stance, compose interesting images with an emotional impact or a social commentary. Today will be your ONLY in class time to take these pics. Any you do not get today will be homework. We will be editing these next week.
Tuesday, December 7, 2010
The Social Experiment


Photojournalism, or documentary photography, is the art telling a story with pictures. Currently, Shorecrest has hundreds of students participating in "The Social Experiment" and taking a break from all social networks. Regardless of your opinions of this event, it provides a prime opportunity for us as photographers to document this adventure! What comes to mind when you consider this week without create comforts of technology? Panic? Alternate forms of communication? withdrawals? Your task today/Thursday is to shoot 24 great images of your peers and otherwise telling the story of the social experiment.

Editing your still life pics
Then you can edit the white balance using the sliders and options on the top right:

Thursday, December 2, 2010
Portraits to turn in

In one folder named your name:
- your favorite full size in class studio picture
- a contact sheet of 12 in class studio pics
- a contact sheet of 40 good portraits from outside of class (no more than 2 subjects)
- 6 edited portraits from outside of class (see 6 editing techniques below)
Tuesday, November 30, 2010
Portrait Editing

- A Vignette Photo
- A Grayscale Method Photo
- A One Item Kept in Color Photo
- A selective Focus Photo
- A high pass filtered portrait or minimal saturation/high contrast portrait to emphasize mood.
- One WHACKY anything goes portrait (change the colors, use the liquefy tool, use a PS filter, and make this as unique and interesting as you can - but make sure it is interesting and not just insane).
Monday, November 22, 2010
Thanksgiving Break Assignment


Make your own light box for $.50
Not having enough light seems to be the #1 annoyance to most people when they’re trying to take nice photos of their items. And #2 is what to do with that light if you do have it!
We can’t post photos here, so I’ll have to keep linking to flickr, but here goes…
I guess lightboxes are cool. I dunno, I’ve never used one. I’ve sold lots of stuff on ebay and craigslist, and have a few things still listed in my vintage shop, and piece of cardboard and light bulb have always served me just fine.
Here’s what I call my 50 cent lightbox:

Yup, a sheet of Bristol board taped to the floor and wall. And today was a perfect day to demonstrate; cold, cloudy, blustery, and quite dark. What you see there is what you get. Not very good light. Big deal.
Enter the light bulb, or to be precise, the Ott bulb. These are cheap, easily available at hardware stores, and the best lighting invention since sliced bread. Even better in fact, since sliced bread has very little to do with photography.
Take one table lamp, remove shade, screw in Ott bulb, and put on stairs. What a difference!

Notice how the light is positioned roughly 45 degrees above the item, and about 45 degrees off to the side. If my space were bigger, I’d use a 2nd bulb on the left as well, to eliminate the shadows cast by this one. Oh well, I’ll just have to make it work. You can move the light around so that you don’t cast shadows where you don’t want them.
Now, stop here and take a good look. Those walls should be lighter. What’s going on? The camera wants to make everything a neutral tone, so if there’s a lot of light stuff in the photo, like here, it will try to darken it to get it to neutral. If I had taken a shot of only the white wall, it would have been even darker, but the floor is pulling the exposure up a bit.
This camera has “Exposure Compensation” which is used to essentially fool the meter. If I set it to overexpose by 1 f-stop, here’s what I get:

Much better. Some of the upper wall on the right is starting to get blasted now, but I don’t care.
So what’s that thing on the cardboard? It’s an ugly old, busted ceramic brooch. Can we make ugly look half decent?
Here’s a shot at floor level:

Not half bad lighting. Notice how only the front part is in focus. This is because the aperture is set to its widest (lowest number f-stop), so the depth of field (portion of the photo in focus) is very shallow. If I set the f-stop to the maximum (smallest aperture), it pulls much more into focus:

Maybe a bit too much detail for this ugly, dirty, broken thing. Buyer beware!
How about something much prettier? Here’s an AUTO shot of our next beauty contestant:

I’ve moved the light closer to the front because I like the illuminating better. Once again, everything is a bit too dark, but we know how to fix that. Here’s a closer shot:

Even darker! Why? Because there’s much more white in the picture, so once again, the camera is trying to pull that white towards neutral grey. So, we crank up the exposure compensation again, just like before, and we zoom in a bit:

The shallow depth of field is much more evident on this larger subject. The little diamond on the front ring of the lens is in sharp focus, but the rest fades into a blur. So once again, we set the aperture for a much higher number:

Now that’s a camera!
And two more examples using a macro:


All this with a sheet of cardboard and one light bulb on a miserable, dark day.
You don’t have to live in sunny California to take well lit photos, you just have to live close enough to a hardware store. And yes, all the item photos were taken on a tripod or with the camera on the floor. There’s absolutely no other way.
Thursday, November 18, 2010
Due end of next week
- 12 studio pics on a CS
- 30 portraits from outside of class
- 6 edited portraits from outside of class
- 1 portrait tutorial
Tuesday, November 16, 2010
portrait specifics


1. Find one or two interesting human subjects. The people you choose should WANT to be in the picture and they should be willing to cooperate.
2. Talk to your subject. You are the director of this adventure, make it what you want. Use colors or lighting to create a concept for your portrait. Costumes or uniforms work great. Imaginary ideas are good. Choose an interesting setting based on your concept.
3. Change angles between shots. Shoot at least 25 pictures of EACH of your two subjects. This will give a good variety of images to pick your 30 from.
5. Change your lighting; Use filters, flashlights, lamps, or multiple lights to enhance your picture.
6. Remember you are the boss, make them change their expression. Pretend it is high fashion and they have to create the next great "look" like blue steel (Zoolander).
7. Most importantly for this assignment don't forget your composition rules. Use framing, leading lines, rule of thirds, color contrast etc. to enhance your photo. And Always Fill the frame!!!!
HAVE FUN & BE CREATIVE!!!! try to think out of the norm to come up with a creative setting, pose, expression, outfit, etc to make an amazing portrait!!!!
Portraits
Once you have your 30 pics we will be editing them in fairly specific ways:
You will need to edit 6 portraits (not from in class) using the following techniques:
- A Vignette Photo
- A Grayscale Method Photo
- A One Item Kept in Color Photo
- A selective Focus Photo
- A minimally adjusted photo
- One WHACKY anything goes portrait (change the colors, use the liquefy tool, use a PS filter, and make this as unique and interesting as you can)
The Healing Brush:
http://livedocs.adobe.com/en_US/Photoshop/10.0/help.html?content=WSfd1234e1c4b69f30ea53e41001031ab64-7605.html
Red Eye"
http://www.creativepro.com/article/photoshop-how-to-five-ways-to-reduce-red-eye
For your anything goes image:
http://www.photoshoproadmap.com/Photoshop-blog/2009/03/31/35-creative-portrait-effects-photoshop-tutorials/
Color and B&W
http://digital-photography-school.com/mono-with-a-dash-of-colour-photoshop-cs2-tutorial
Thursday, November 11, 2010
Studio Lighting
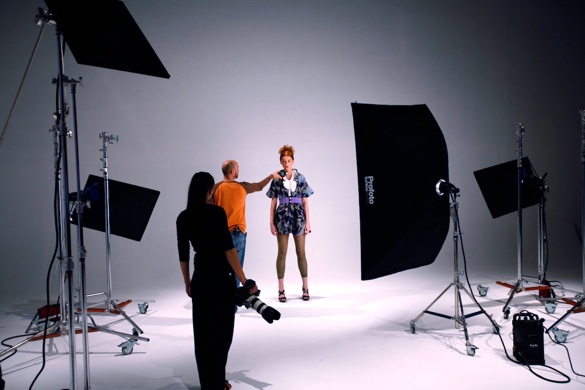
Friday you will be finishing your studio lighting portrait shoots. You need to shoot 3 or 4 good interesting and creative pics per station, per person. Monday we will be editing these pics.