Friday - shooting day (once questions are answered on web site)
Monday - Editing day & first 40 image contact sheet due
Wednesday - Shooting day
Friday - Short period, second 40 image contact sheet due
Be sure your topic is attainable, interesting, and can set you up for success! Each of the final images you turn in (9 for UC, 6 for Seniors) needs to be reflective of the absolute BEST you can do and should represent your topic from a unique angle and be a stand alone amazing image.
Good Luck!
Thursday, May 31, 2012
Wednesday, May 30, 2012
Lots due today
Today is going to be a work day to catch up, turn things in, and make sure your grade us where you want it.
Here is what is due:
Portraits:
Here is what is due:
Portraits:
- 4 edited out of class portraits
- contact sheet of 24 best portraits (no more than 2 subjects
- 4 edited in class portraits
- contact sheet of 12 in class portraits
- Email me a link to your gallery:
- brian.story@shorelineschools.org
- answer these 8 questions today regarding your portfolio topic.
- http://learn.shorelineschools.org/shorecrest/bstory/index.php?section=discussion&threadID=31992
- Some images are still not printed, easy points, turn in your favorite pic!
Tuesday, May 22, 2012
Portrait Retouch
Follow 4 of the following:
http://www.smashingmagazine.com/2008/07/15/70-beauty-retouching-photoshop-tutorials/
http://sixrevisions.com/photoshop/26-professional-photoshop-retouching-tutorials/
http://www.smashingmagazine.com/2008/07/15/70-beauty-retouching-photoshop-tutorials/
http://sixrevisions.com/photoshop/26-professional-photoshop-retouching-tutorials/
Monday, May 21, 2012
Art Expo
At the start of class today please turn in ONE image that you are most proud of. This image will be printed and on display in the SC Art Expo.
Try and find an image that is not over edited, is unique, interesting, creative, and stands out from the crowd.

Try and find an image that is not over edited, is unique, interesting, creative, and stands out from the crowd.

Thursday, May 17, 2012
Out of Class Portraits
For every shot you should consider your subject, their expression, the "mood" you want in the image, the background, the pose, and your composition. You are the boss when shooting portraits, take charge?
Think about:


1. Find no more than 2 interesting human subjects. The people you choose should WANT to be in the picture and they should be willing to cooperate.
2. Talk to your subject. You are the director of this adventure, make it what you want. Use colors or lighting to create a concept for your portrait. Costumes or uniforms work great. Imaginary ideas are OK. Choose an interesting setting based on your concept.
3. Change angles between shots. Shoot at least 10 pictures of EACH of your two subjects. This will give a good variety.
Think about:
- perspective
- eye contact
- rules of composition
- experiments with lighting
- dramatic subject (out of comfort zone)
- shoot candidly
- introduce a prop
- focus on a body part
- obscure your subject
- take a series of shots (this will require more than 15 total pics)


1. Find no more than 2 interesting human subjects. The people you choose should WANT to be in the picture and they should be willing to cooperate.
2. Talk to your subject. You are the director of this adventure, make it what you want. Use colors or lighting to create a concept for your portrait. Costumes or uniforms work great. Imaginary ideas are OK. Choose an interesting setting based on your concept.
3. Change angles between shots. Shoot at least 10 pictures of EACH of your two subjects. This will give a good variety.
4. Change your lighting; Use filters, flashlights, lamps, or multiple lights to enhance your picture.
5. Remember you are the boss, make them change their expression. Pretend it is high fashion and they have to create the next great "look" like blue steel (Zoolander).
6. Most importantly for this assignment don't forget your composition rules. Use framing, leading lines, rule of thirds, color contrast etc. to enhance your photo. Fill the frame!!!!
HAVE FUN & BE CREATIVE!!!! try to think out of the norm to come up with a creative setting, pose, expression, outfit, etc to make an amazing portrait!!!!
HAVE FUN & BE CREATIVE!!!! try to think out of the norm to come up with a creative setting, pose, expression, outfit, etc to make an amazing portrait!!!!


Studio Pics
Studio Lighting!!!
Your task this week is to shoot some interesting , creative and unique portraits using the studio lights. Remember the different lighting techniques seen in class.Use the lights to add emotion, feeling, or interesting shadows to your images. Try to think out of the box, manipulate the image with Manual settings on the camera, blur motion, stop action, take tons of pics, and ha
Your task this week is to shoot some interesting , creative and unique portraits using the studio lights. Remember the different lighting techniques seen in class.Use the lights to add emotion, feeling, or interesting shadows to your images. Try to think out of the box, manipulate the image with Manual settings on the camera, blur motion, stop action, take tons of pics, and ha


Studio Lighting
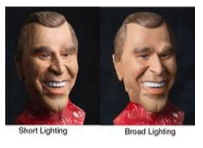
What Is Short Light?
Short light is type of studio lighting setup, where the face side which is further from the camera gets the main light. see the diagram for details. In this type of lighting setup, the side of the face which is toward the camera gets less light then the side facing away form the camera. The effect you get when using this lighting setup is a thin face, this is why it is good to photograph fat (or chubby) people with a short light setup.
Let's look at a picture of a friend of mine - Winnie the poo. Looks like Winnie had allot of honey and he is quite chubby. The flash is set up to my right, and Winnie is looking to his left. This make his face look a bit thinner than what they really are. Short light is very useful in portrait photography, as it gives drama to the subject. (Short light setup also stresses skin wrinkles, to create even more drama for older people)

What Is Broad Light?
Broad light is just the opposite of Short light. In the Broad Light setup, THe side that is getting the most light is the side turning towards the camera. This setup is less commonly used for portraits as it tends to make people look chubby. See the diagram for setup.

Lets look at Winnie again. This picture was taken at the same focal length (135mm with 1.5 crop factor D70's sensor). This time Winnie looks very chubby. Oh Winnie! what have you been eating? Also note how the picture looks a bit flatter. There are not allot of light and shade plays.

For both types of light you can use a fill light at the opposite side to the main light, or do as I did and use a reflector at 45 deg. (see diagrams).
Conclusion:
Short light is type of studio lighting setup, where the face side which is further from the camera gets the main light. see the diagram for details. In this type of lighting setup, the side of the face which is toward the camera gets less light then the side facing away form the camera. The effect you get when using this lighting setup is a thin face, this is why it is good to photograph fat (or chubby) people with a short light setup.
Diagram 1 - Short Light
Let's look at a picture of a friend of mine - Winnie the poo. Looks like Winnie had allot of honey and he is quite chubby. The flash is set up to my right, and Winnie is looking to his left. This make his face look a bit thinner than what they really are. Short light is very useful in portrait photography, as it gives drama to the subject. (Short light setup also stresses skin wrinkles, to create even more drama for older people)
What Is Broad Light?
Broad light is just the opposite of Short light. In the Broad Light setup, THe side that is getting the most light is the side turning towards the camera. This setup is less commonly used for portraits as it tends to make people look chubby. See the diagram for setup.
Diagram 2 - Broad Light
Lets look at Winnie again. This picture was taken at the same focal length (135mm with 1.5 crop factor D70's sensor). This time Winnie looks very chubby. Oh Winnie! what have you been eating? Also note how the picture looks a bit flatter. There are not allot of light and shade plays.
For both types of light you can use a fill light at the opposite side to the main light, or do as I did and use a reflector at 45 deg. (see diagrams).
Conclusion:
| Light Type | Side to Get Most Light | Chubbiness | Wrinkles |
| Short Light | Away From Camera | Reduce | Intensify |
| Broad Light | Facing Camera | Increase | Reduce |


Wednesday, May 16, 2012
your pics...
Gallery Web Site
http://www.wix.com/
or
http://www.weebly.com/
Both are web site building tools with preformatted layouts and designs.
You site must contain:
- Home page with some statement pertaining to you as an artist/photographer
- 20+ images that you have taken
- at least 3 categorical pages of images (i.e. fall, portraits, B&W, landscapes, etc)
- each image must have a caption describing the image, composition, edits, etc.
examples:
http://www.wix.com/schobersam/thegalleryofschober
http://genevasphotos.weebly.com/
http://alexramseyphotography.weebly.com/
Wednesday, May 9, 2012
Portrait Day 1
Choose 3 of the below techniques and shoot a GOOD image that demonstrates it.
You will turn in a contact sheet of your 3 best examples.
You will turn in a contact sheet of your 3 best examples.
Potrait Info
Tuesday, April 17, 2012
Portraits
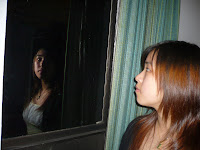
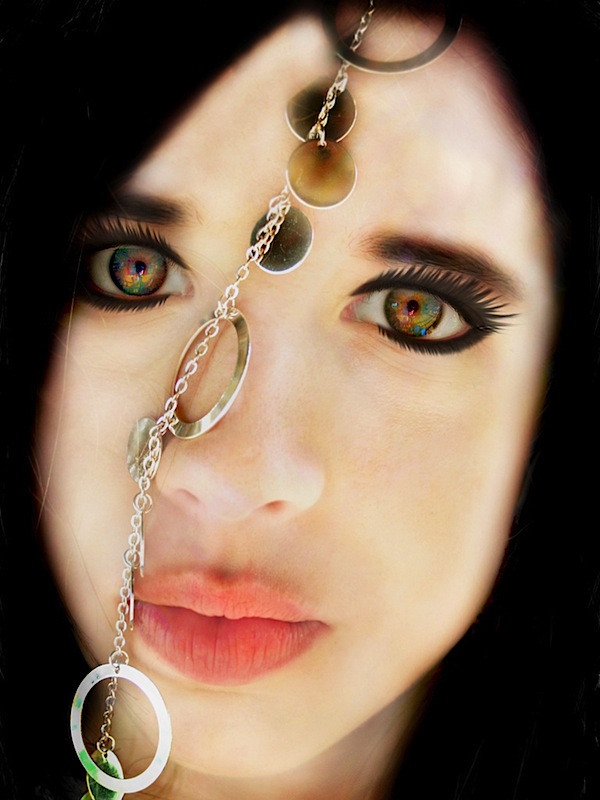
11. Frame Your Subject
Framing is a technique where by you draw attention to one element of an image by framing it with another element of the image.
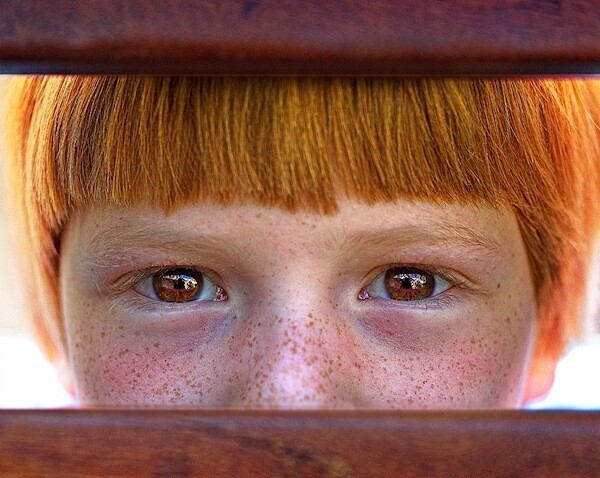 Image by darkmatter
Framing gives an image depth and draws the eye to a point of interest in the image.
You
could do it by placing your subject in a window or doorway, have them
look through a small gap or even use their hands around their face. See
more examples of framing in photography here.
12. Go with a Wide Angle
Shooting
with a wide angle lens attached to your camera can help create some
memorable shots when you’re doing portrait photography.
At
very wide focal lengths you can create some wonderful distortion. It
might not be the type of shot you take of your wife or girlfriend
(unless she’s in a playful mood) but using these focal lengths will
enlarge parts of the face or body that are on the edge of the frame more
than what is in the centre.
It can also give a wide open and dramatic impact when your subject is in an impressive setting.
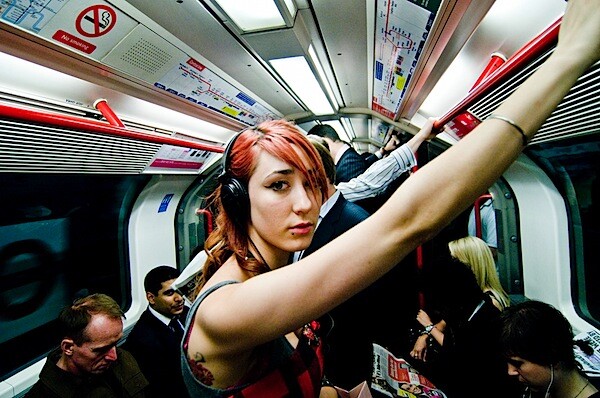 Image by paulbence
13. Play With Backgrounds
The
person in your portrait is the main point of interest – however
sometimes when you place them into different contexts with different
backgrounds you can dramatically alter the mood in a shot.
Sometimes you want your background to be as minimalistic as possible.
 Portrait by akbar1947
While other times a dramatic or colorful background can help your subject really stand out.
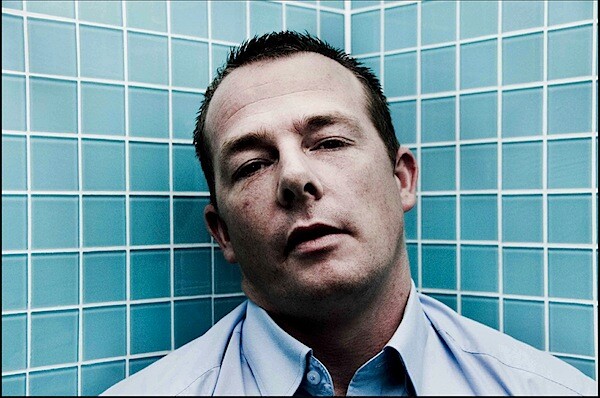 Photo by paulbence
The key is to experiment.
14. Change the Format Framing
Many
photographers get stuck in a rut of only ever shooting either in
‘landscape’ (when the camera is held horizontally) or ‘portrait’ (when
the camera is held vertically) modes. Look back through your images and
see which one you use predominantly.
Just
because a vertical framing is called ‘portrait’ mode doesn’t mean you
always need to use it when shooting portraits. Mix your framing up in
each shoot that you do and you’ll add variety to the type of shots you
take.
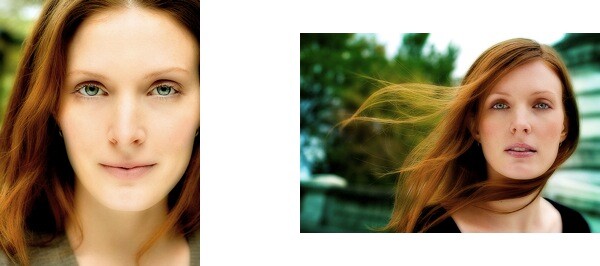 Image by bikeracer
15. Hold Your Camera on an Angle
Horizontal and Vertical framings are not the only options when it comes to shooting portraits. While getting your images straight can
be important in when shooting in these formats holding your camera on a
more diagonal angle can also inject a little fun into your images.
This
type of framing can add a sense of fun and energy into your shots. Just
don’t ’slightly’ do it or you’ll have people asking themselves if you
might have mistakenly held your camera crooked.
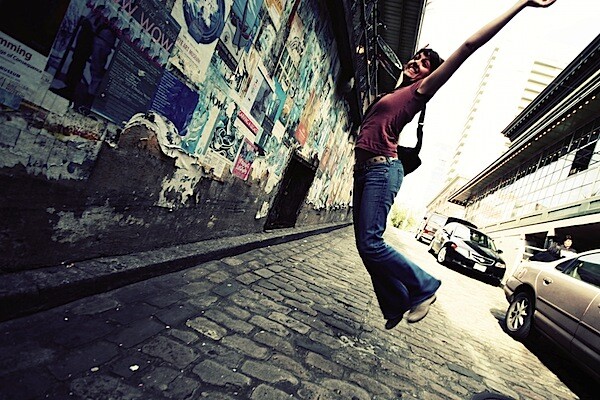 Photo by puja
16. Take Unfocused Shots
As
photographers we have ’sharp focus’ drummed into us as an ultimate
objective to achieve in our work – but sometimes lack of focus can
create shots with real emotion, mood and interest.
There are two main strategies for taking unfocused images that work:
1.
Focus upon one element of the image and leave your main subject
blurred. To do this use a large aperture which will create a narrow
depth of field and focus upon something in front of or behind your
subject.
 Photo by Jeff Kubina
2.
Leave the full image out of focus. To do this again choose a wide
aperture but focus well in front or behind anything that is in your
image (you’ll need to switch to manual focussing to achieve this).
These kinds of shots can be incredibly dreamy and mysterious.
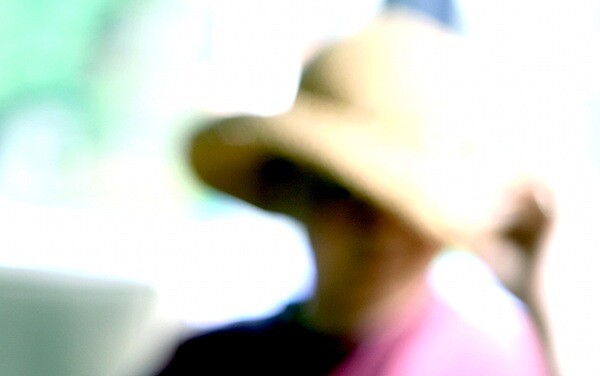 Portrait by peskymac
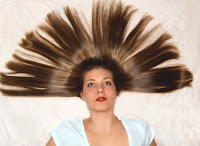
17. Introduce Movement
Portraits can be so static – but what if you added some movement into them? This can be achieved in a few ways:
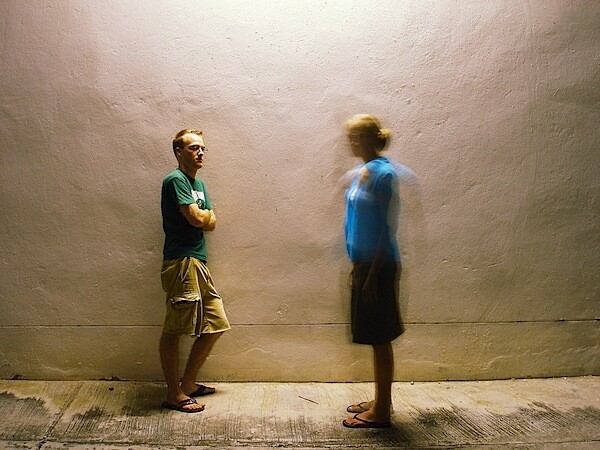 Photo by Michael Sarver
- by making your subject move
- by keeping your subject still but having an element in the scene around them move
- by moving your camera (or it’s lens to achieve a zoom burst)
 Portrait by philippe leroyer
The key with the above three methods is to use a slow enough shutter speed to capture the movement.
The alternative is to have your subject obviously move fast but to use a shutter speed so fast that it ‘freezes’ their movement.
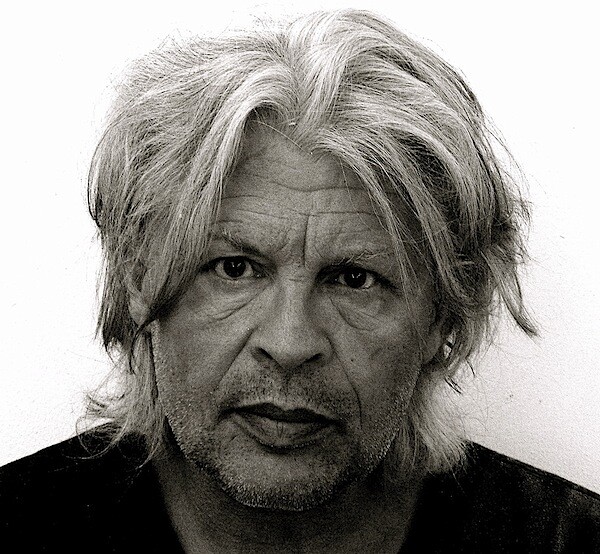
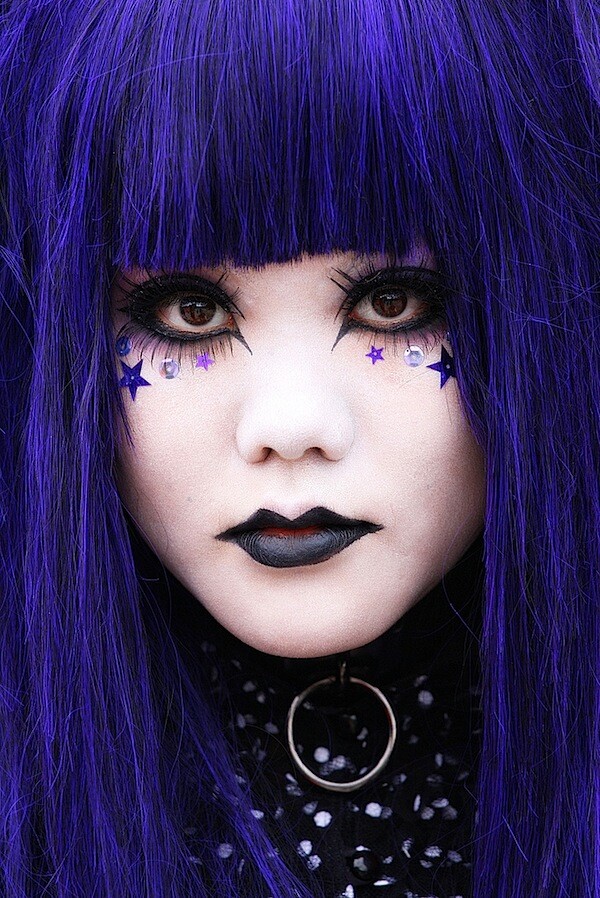
18. Experiment with Subject Expressions
In some portraits it is the expression on the face of your subject that makes the image.
Get your subject to experiment with different moods and emotions in your image. Play with extreme emotions
 Portrait by carf
But also try more sombre or serious type shots
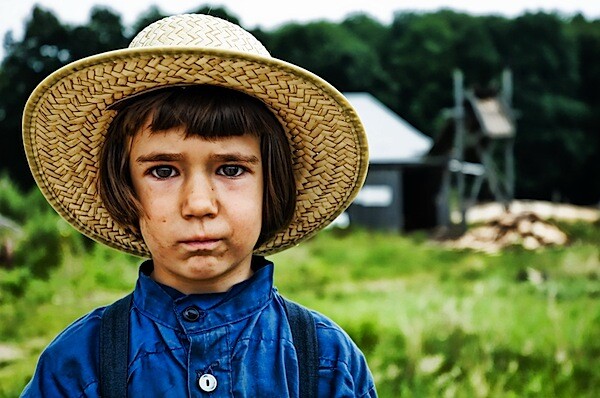 Photo by Stuck in Customs
19. Fill the Frame
One way to ensure that your subject captures the attention of the viewer of your portrait is to fill the frame with their face.
It’s
not something that you’d do in every shot that you take – but if your
subject is the only feature in the shot – there’s really nowhere else to
look.
Portrait by kkelly2007
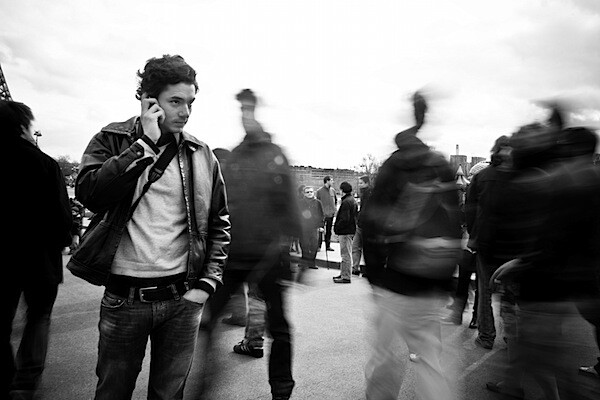
20. Find an Interesting Subject
I have a friend who regularly goes out on the streets around Melbourne looking for interesting people to photograph.
When
he finds someone that he finds interesting he approaches them, asks if
they’d pose for him, he quickly finds a suitable background and then
shoots off a handful of shots quickly (if they give him permission of
course).
The result is that he has the most wonderful collection of photographs of people of all ages, ethnicities and backgrounds.
While
many of us spend most of our time photographing our loved ones –
perhaps it’d be an interesting exercise to shoot interesting strangers
once in a while?
 Portrait by .mushi_king
Read more: http://www.digital-photography-school.com/tips-portrait-photography#ixzz14Q5tYPUl
Wednesday, November 3, 2010
Portraits...
1. Alter Your Perspective
Most portraits are taken with the camera at (or around) the eye level of the subject. While this is good common sense – completely changing the angle that you shoot from can give your portrait a real WOW factor.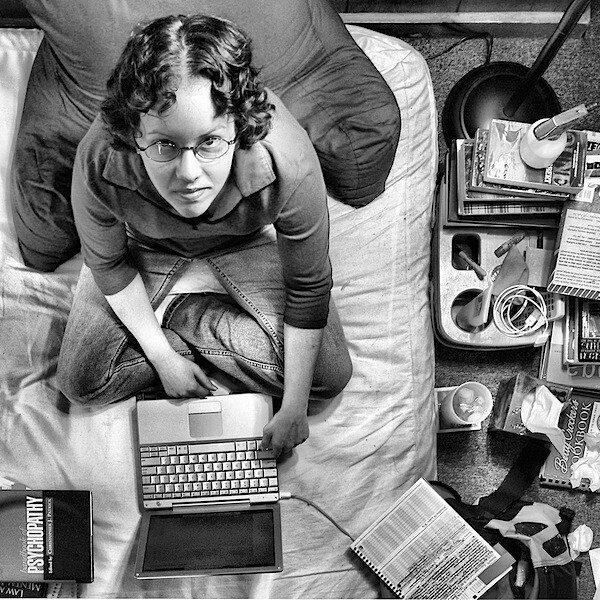 Photo by striatic
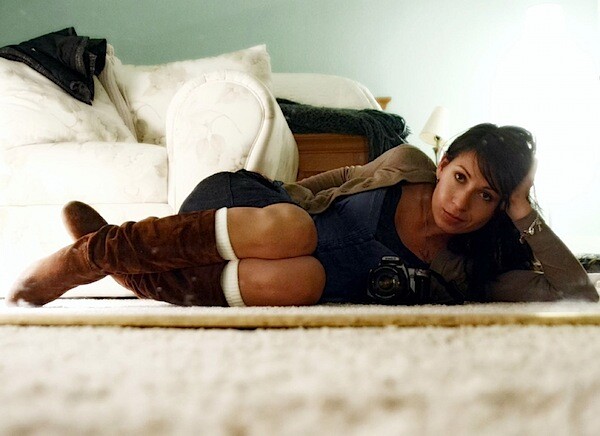 Photo by TeeRish
2. Play with Eye Contact
It is amazing how much the direction of your subject’s eyes can impact an image. Most portraits have the subject looking down the lens – something that can create a real sense of connection between a subject and those viewing the image. But there are a couple of other things to try:A. Looking off camera – have your subject focus their attention on something unseen and outside the field of view of your camera. This can create a feeling of candidness and also create a little intrigue and interest as the viewer of the shot wonders what they are looking at. This intrigue is particularly drawn about when the subject is showing some kind of emotion (ie ‘what’s making them laugh?’ or ‘what is making them look surprised?’). Just be aware that when you have a subject looking out of frame that you can also draw the eye of the viewer of the shot to the edge of the image also – taking them away from the point of interest in your shot – the subject.
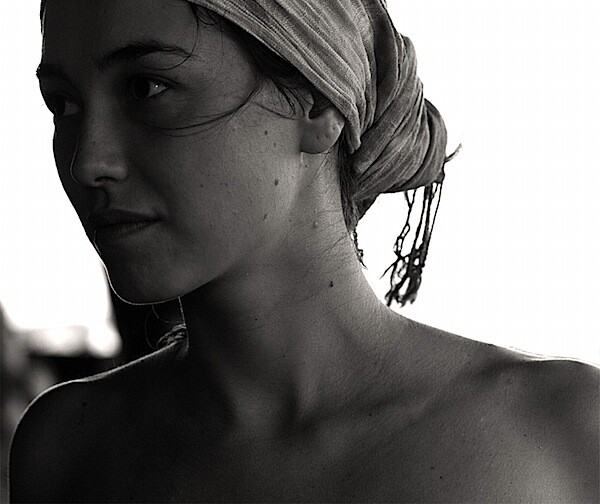 Photo by monicutza80
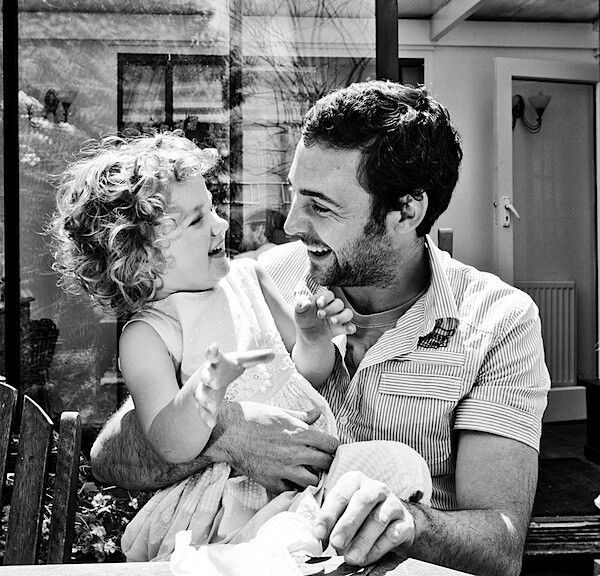 Photo by paulbence
3. Break the Rules of Composition
There are a lot of ‘rules’ out there when it comes to composition and I’ve always had a love hate relationship with them. My theory is that while they are useful to know and employ that they are also useful to know so you can purposely break them – as this can lead to eye catching results.The Rule of Thirds is one that can be effective to break – placing your subject either dead centre can sometimes create a powerful image – or even creative placement with your subject right on the edge of a shot can sometimes create interesting images.
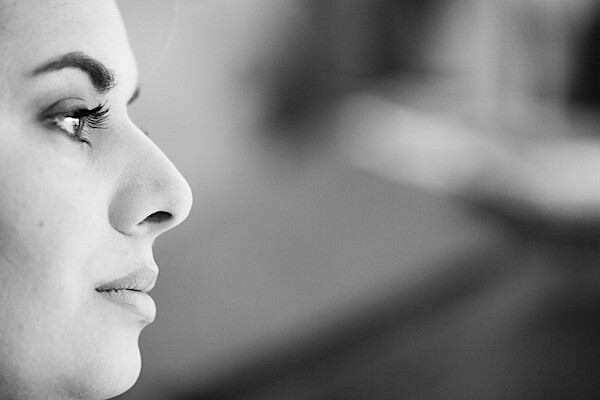 Photo by reportergimmiâ„¢
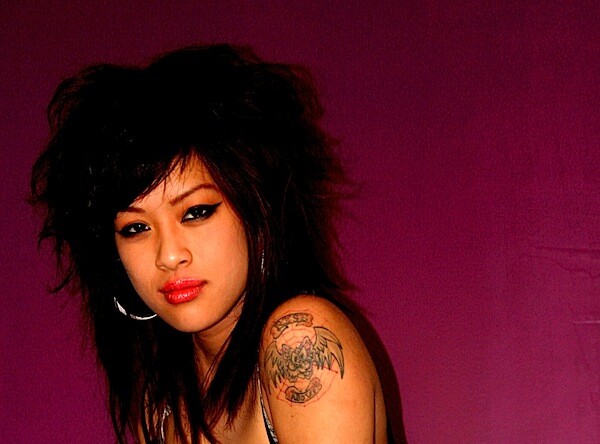 Photo by Bukutgirl
4. Experiment with Lighting
Another element of randomness that you can introduce to your portraits is the way that you light them. There are almost unlimited possibilities when it comes to using light in portraits.Side-lighting can create mood, backlighting and silhouetting your subject to hide their features can be powerful.
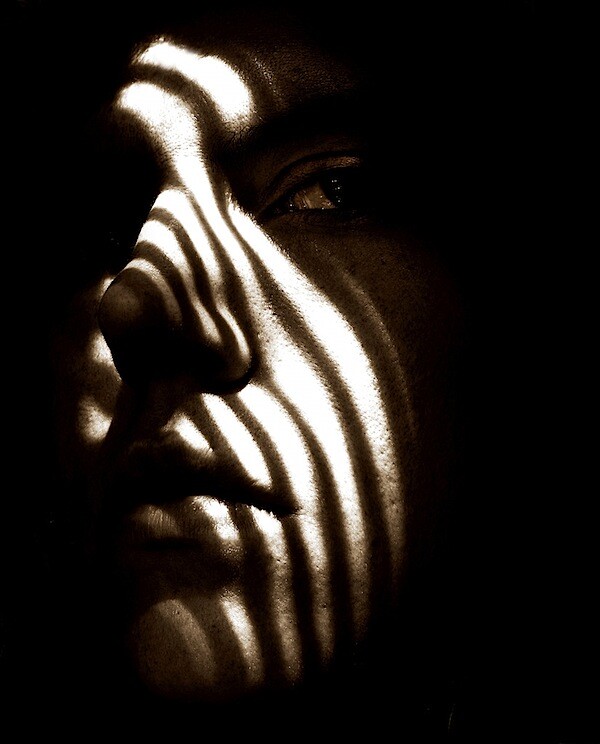 Photo by Bukutgirl
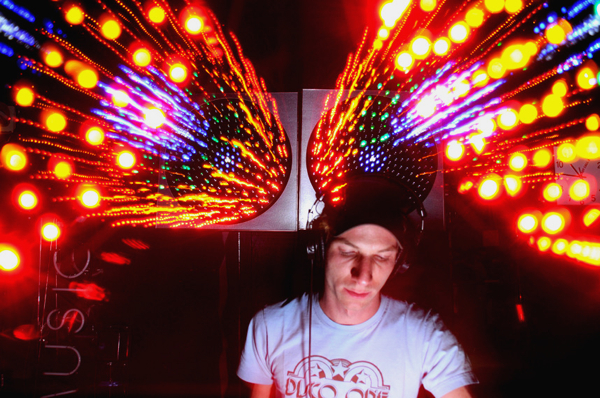 Photo by diskomethod
5. Move Your Subject Out of their Comfort Zone
I was chatting with a photographer recently who told me about a corporate portrait shoot that he had done with a business man at his home. They’d taken a lot of head and shoulder shots, shots at his desk, shots in front of framed degrees and other ‘corporate’ type images. They had all turned out fairly standard – but there was nothing that really stood out from the crowd.The photographer and the subject agreed that there were plenty of useable shots but they wanted to create something ’special’ and out of the box. The photographer suggested they try some ‘jumping’ shots. The subject was a little hesitant at first but stepped out into the uncomfortable zone and dressed in his suit and tie started jumping!
The shots were amazing, surprising and quite funny. The shoot culminated with the subject jumping in his pool for one last image!
While this might all sound a little ’silly’ the shots ended up being featured in a magazine spread about the subject. It was the series of out of the box images that convinced the magazine he was someone that they’d want to feature.
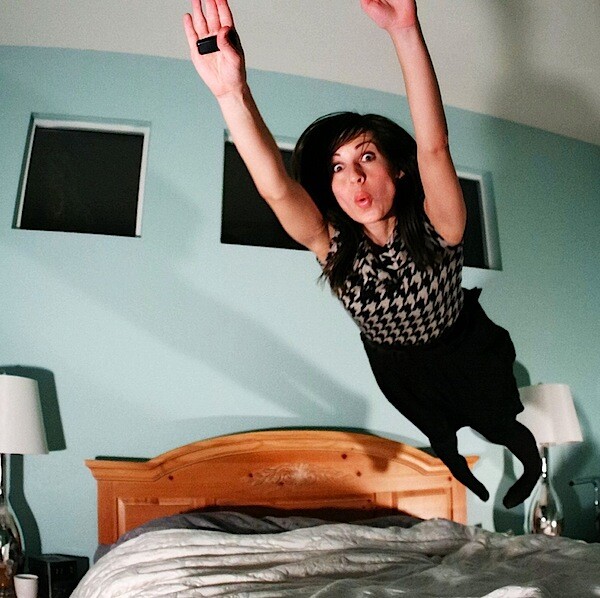 Image by TeeRish
7. Introduce a Prop
Add a prop of some kind into your shots and you create another point of interest that can enhance your shot.Yes you might run the risk of taking too much focus away from your main subject but you could also really add a sense of story and place to the image that takes it in a new direction and gives the person you’re photographing an extra layer of depth that they wouldn’t have had without the prop.
 Photo by Mrs. Maze
8. Focus Upon One Body Part – Get Close Up
Get a lens with a long focal length attached to your camera – or get right in close so that you can just photograph a part of your subject. Photographing a person’s hands, eyes, mouth or even just their lower body… can leave a lot to the imagination of the viewer of an image.Sometimes it’s what is left out of an image that says more than what is included.
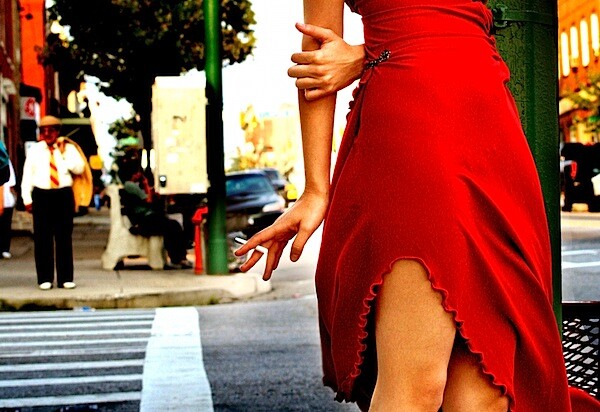 Photo by Bukutgirl
9. Obscure Part of your Subject
A variation on the idea of zooming in on one part of the body is to obscure parts of your portrait subject’s face or body. You can do this with clothing, objects, their hands or just by framing part of them out of the image.Doing this means that you leave a little to the imagination of the image’s viewer but also focus their attention on parts of your subject that you want them to be focused upon.
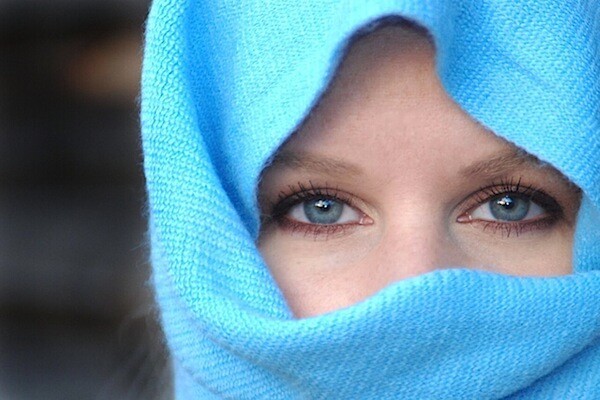 Photo by BigBlonde
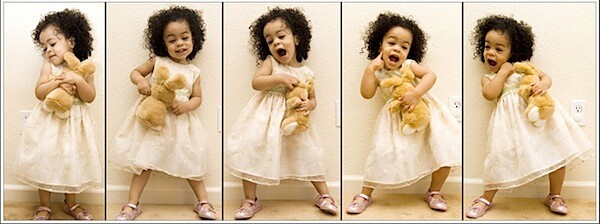
10. Take a Series of Shots
Switch your camera into ‘burst’ or ‘continuous shooting’ mode and fire off more than one shot at a time.In doing this you create a series of images that could be presented together instead of just one static image.
This technique can work very well when you’re photographing children – or really any active subject that is changing their position or pose in quick succession.
Monday, May 7, 2012
Missing from Friday
Please help us find these items missing from S2 on Friday:
SD Cards & Tripod Mounts!!!


SD Cards & Tripod Mounts!!!


Subscribe to:
Comments (Atom)