Friday, February 26, 2010

Tuesday, February 23, 2010

landscapes......

Start Shooting!!!

Tue/Wed will be shooting days for landscapes. You must go to at least 2 different locations by Thurs/Fri and shoot a minimum of 25 different pictures. Remember the short video, at each vantage point change your foreground interest, alter your perspective, switch your camera angle, zoom in/out, mix things up. This is the beauty of digital, you can never have TOOOO many images.

  • Due Thurs/Fri -- 25 landscapes from 2+ locations

Monday, February 22, 2010

example landscapes

http://www.outdoor-photos.com/

post it here:
http://learn.shorelineschools.org/shorecrest/bstory/index.php?section=discussion&threadID=23014

Landscape Tips


Here are some surefire tips to help our landscapes... please read these, pick a tip you think is most advantageous.

Student Examples...


Landscape comprises the visible features of an area of land, including physical elements such as landforms, living elements of flora and fauna, abstract elements like lighting and weather conditions, and human elements like human activity and the built environment.
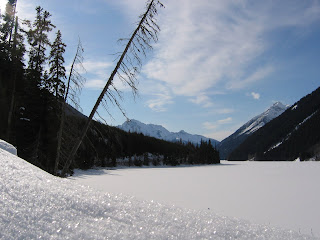



REMEMBER: do not center the horizon line and try to show something in the foreground, mid-ground, and background.

The image “http://akvis.com/img/examples/sketch/photo-on-sketch/landscape-photo.jpg” cannot be displayed, because it contains errors.

Landscapes!!!


Photography has a couple of compositional rules we will work with this semester. First and most notable is the rule of 1/3. This states that an image can be divided into nine equal parts by two equally-spaced horizontal lines and two equally-spaced vertical lines. The four points formed by the intersections of these lines can be used to align features in the photograph. Additionally the horizon line should be placed on either the upper or lower deviding line.

For landscapes there should also be 3 prominant areas in the photograph, for/mid/background. This will add depth to your images and lead the viewer deeper into the photograph.

Your task in the coming week(s) is to shoot landscapes... lots and lots and lots of interesting landscapes. Consider changing camera angles, geting closer, farther away, squatting down, standing on something tall, and always follow the rules above to find great success.

Friday, February 12, 2010

Editing Your pictures

We want to work with 6 adjustments
  • hue/saturation
  • curves
  • brightness/contrast
  • exposure
  • shadow/highlight
  • Color Balance
And the 4 selection tools we learned about to adjust specific areas.
the lasso tools and the magnetic wand.

Thursday, February 11, 2010

QUIZ TODAY

Today we will have a quiz on Composition.

We will then work on editing images. We will turn in:
  • a contact sheet with 16 amazing pics (4 of each technique)
  • 4 full size edited images (one of each technique)
  • 4 full size UN-edited images (one of each technique
  • All images should be .jpeg files, in ONE FOLDER, Labeled YOURNAME_COMPOSITION and placed into the classes folder on the staff server.

Tuesday, February 9, 2010

Tue/Wed SHOOTING!

Today is your first shooting period. You need to shoot a boat load of images looking for the composition techniques we covered Monday... And remember there will be a quiz on Thur/Fri.

Shooting:
Look for the following compositional techniques
  • leading lines
  • frame withing a frame
  • balance
  • perspective/viewpoint
Shoot a TON of pics for each technique. Your goal is to end with 4 GREAT images for each technique. This may take 40 or so pics to achieve.

Monday, February 8, 2010

Composition!

Please read each of the following (there will be a quiz including these terms on Thurs/Fri):

http://www.microsoft.com/windowsxp/using/digitalphotography/learnmore/composition.mspx

http://knol.google.com/k/yanik-chauvin/photography-composition-an-introduction/2rcdarvscszjb/2#

http://www.amateursnapper.com/photography/10-top-photography-composition-rules

TAKE NOTES! you need to have notes which include definitions for:
  • leading lines
  • frame withing a frame
  • balance
  • perspective/viewpoint
  • cropping
  • background
  • depth
  • Symmetry & patterns
  • rule of thirds (you should know this by now!)
(notes will be checked on Tue/Wed)
Your next task:

Shoot Tue/Wed looking for leading lines, frame withing a frame, balance, & perspective/viewpoint. You will be turning in 16 INTERESTING shots using the four techniques described above in each image. Expect that you will take 30-40 pictures to result in 16 good ones.

Please use rule of thirds and remember that the subject should fill the frame. Remember you will take anywhere from 30-40 pictures. However, you will only need to turn in your best four pictures for each composition technique.

Friday, February 5, 2010

to import...

  • Open IMAGE CAPTURE FROM YOUR APPLICATIONS FOLDER
  • Plug in your camera and turn it on

  • Select DOWNLOAD SOME.
  • Choose a new folder to download into EVERY time you download.
  • Next select the pictures you want to download and save them to your NEW folder.
  • and oyu are DONE!

Viewpoint

Doll photographed from an unusual viewpoint

The unusual viewpoint of this photo makes for an interesting composition. Image by dollie_mixtures.

Before photographing your subject, take time to think about where you will shoot it from. Our viewpoint has a massive impact on the composition of our photo, and as a result it can greatly affect the message that the shot conveys. Rather than just shooting from eye level, consider photographing from high above, down at ground level, from the side, from the back, from a long way away, from very close up, and so on.

HOW TO MAKE A CONTACT SHEET


In Photoshop CS3:

* Create a new folder on your desktop with your pictures.
* Open Photoshop CS3.
* Select File>Automate>Contact Sheet II
* Select on Folder and choose the folder your created.
* Make sure the image size is 8*10 inches.
* The resolution should be 300.
* Columns=3 and rows=5.
* Click OK.
* File>Save as a jpeg

angles...

pick 5 subjects/objects, and shoot 3 pictures of each, from creative, unique and interesting angles... also keep in mind the rule of thirds... we will then make a contact sheet in PS to display your pics...


Wednesday, February 3, 2010

Composition

  1. The rule of thirds: an image can be divided into nine equal parts by two equally-spaced horizontal lines and two equally-spaced vertical lines. The four points formed by the intersections of these lines can be used to align features in the image. aligning a photograph with these points creates more tension, energy and interest in the photo than simply centering the feature would.
    This photograph of a sunset taken in the Thousand Islands region demonstrates the principles of the rule of thirds
    This photograph of a sunset taken in the Thousand Islands region demonstrates the principles of the rule of thirds

Academic Plans...

Due back on Monday.