This site is a tool for students in Digital Photo at Shorecrest. It is used to give you useful information about our class, assignments, and due dates.
Tuesday, October 26, 2010
merges
Monday, October 25, 2010
Thursday, October 21, 2010
merge schedule
- Tuesday 10-19: practice
- Thursday 10-21: Shooting - take at least one good usable photomerge and one set of sequence pics
- Monday 10-25: Editing day (One additional merge/sequence from the weekend required)
- Tuesday 10-26: Shooting day #2
- Thursday 10-28: Editing day #2 - project due
- you will turn in 4 images (a combination of sequence and merge)
Merger shooting
Since your final photo depends on the quality of the source images it is necessary to make note of some tips when shooting scenic photographs. These tips include:
- Use manual exposure/white balance when shooting pictures. Merging the pictures later on will be difficult if different exposures per shot are used.
- Try to keep the camera as steady as possible when shooting. If you can, use a tripod to steady the camera.
- Keep a long distance between the camera and the subject, especially when working with landscapes. Chances of parallax are greater when objects are too close to the camera.

For action sequences:

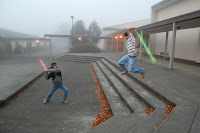
When you’re creating a sequence photo make sure you get all the action you need. This can be done by choosing the action setting on a DSLR. Make sure you have a camera that able to do high shutter speeds. A DSRL that can shoot 3-5fps can get you great results. Then set the camera up in a sturdy location or on a sturdy tripod so movement between frames is limited. Below are some truly amazing examples of sequence photography. The trick is to hold the camera steady and have the action move through multiple frames/photos:
Sequence backmobe | loic2co
Xfighters Madrid | Ray Demski
Björn Dunkerbeck | Ray Demski
Strobed Sequence | JK Photography Studio
Greggins Jumping green water | ivotedforkodos
Snowboard Sequence Photography | Marcio Abe
Mike Metzger | Jake Ashcraft
Experiment | k4rp
Phil on ‘Stab in the Dark’ | Enlightened Fellow
Pastrana’s Red Bull No Limits Jump Practice | BNQT
Jordan | mr.ainsworth
Hollywood | Sandy’s dad
Waterjump | Edmunds Brencis
Jeff Jensen | Entity Boardshop
Stonegate Quarterpipe | nickteezy408
Sequence Summer Jump | Dragan Zlatonovic
Snowboarding shots | Jaime Vedres
Coming at ya | Cropley Imagery
All FMX Sequence | Jason Halayko
Falls Clones | Timhaiti
Tuesday, October 19, 2010
MERGE!


Your assignment over the next eight days (more specifics and details to come):
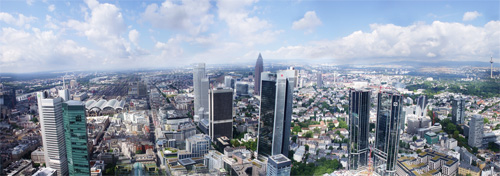
You will create Photomerge pictures. These are 4-5 pictures that overlap to show a wide landscape or cityscape or an action sequence or ??? be creative! (one big picture).
Use a tripod if possible. Remember to manual adjust white balance or select something like "cloudy" or "sunny" on your camera.
Tue: Photomerge Basics
Thurs: Photomerge shooting day
Mon: At least 2 photomerges due from this week
Tue: Advanced Sequenced Shooting
Thurs: In Class editing
**All final locations/sequences are due next Thurs


Thursday, October 14, 2010
experiments in photoshop

Today is going to be a day to learn photoshop, mostly on our own! Your task is to follow this link and find 2 (yes two) photo effects that you think are neat. You will then have 30 minutes to take the image(s) you need to complete the tutorials. The remainder of class will be spent photoshopping the images you have taken using the tutorials you selected!
- pick 2 photo effects you like (make sure they are not blocked!)
- 30 min max to take pics needed to accomplish above
- remainder of class to edit pics
Tuesday, October 12, 2010
to turn in
- 6 edited abstract images
- 40 total different abstracts
(all in one folder)
editing abstracts
make a selection
feather
select inverse
apple J
filter>blur>G.Blur
VIGNETTE
make a selection
feather
select inverse
layer> new> layer
fill your selection with black (fill bucket)
select > deselect
filter>blur>G.Blur
lower opacity
Monday, October 11, 2010
more abstracts, with slow shutters!

http://digital-photography-school.com/shutter-speed
http://www.ephotozine.com/article/Camera-Shutter-Speeds-explained-4794
http://www.takegreatpictures.com/slow_shutter_speeds.fci
http://coolandspicy.net/2009/04/some-slow-shutter-fun/

http://www.picpot.co.uk/tips-for-abstract-photography-5.html
http://4pphotoblog.blogspot.com/2008/05/shutter-painting.html
Tuesday, October 5, 2010
abstract schedule
10/7 - short assembly day - in class activity
10/11 - abstract show shutter speed shooting day
10/12 - in class editing day. all abstracts due!
abstract shooting day!!!
Even my least favorite subject (fire hydrant in front of our class) can be made interesting from a unique perspective.

Monday, October 4, 2010
more on abstracts...
Abstract photography is unlike most other types of photography - rules, such as composition and accurate focusing hold no values. The abstract photographer uses his creative imagination to create stunning works of art.
Abstract photography is a popular form of art and the rewards for a good abstract photographer are most worthwhile. Art buyers pay large amounts for good abstract work.
What is abstract photography?
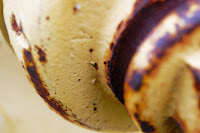
Abstract photography is a process of using colours and patterns combined to create an image, with no true meaning or no clear subject involved. Abstract photography is not necessarily going to mean the same thing to everyone. Abstract photography leaves more to the imagination and helps us concentrate on texture and colour rather than the whole subject.
If you are looking to try a new form of photography, abstract photography will certainly be an enjoyable challenge and very rewarding if you master the true art.
Creating an abstract image can be easy - creating a great abstract image is difficult. One of the most simple ways of creating an abstract image is by using water and your cameras’ shutter combined. Shooting fast flowing water, with a slow shutter speed of one second will give you a blur effect. This is quite simple to do, but will it look attractive?
This will depend on light - shooting water with a slow shutter speed when the sun is low in the sky will give your image more attractive colours. Different films will also produce different colours. Adding colour filters will also improve your abstract photography. If you are using a digital camera, filters can be added later with Photoshop.
Using a slow shutter speed to shoot a flag blowing in the wind will also give you an abstract image. The trick to keeping abstract photography attractive when using your cameras’ shutter is to crop tightly. Fill the view finder with the blur image.
Some kinds of macro photography can be considered as abstract. Close-ups of flowers and other plant life will make great abstract subjects. As with shooting water - macro abstracts should be cropped tightly and the image should have a theme of colour. Some street lights can also create abstract photographs.
Every where we go we are surrounded with colour, textures and patterns. Patterns make for great abstract images. New patterns are formed by nature every day and this is the best place to start to create marketable abstract photographs.
There are no guidelines for creating good abstract images, just use your imagination along with the natural world to create your master piece.


